0.1 The GPU Pipeline
Previously, we learned how applications connect with GPUs through drivers. However, the drivers only handle the plumbing work by passing data between the application and the GPU; they don't perform any actual graphics processing. Once a drawing request has been sent to a GPU, it must be executed by the GPU and eventually produce visible pixels. In this section, we will explore how a GPU processes draw commands and produces pixels through a process known as the GPU pipeline. The GPU pipeline can be likened to a pixel-producing factory: it takes configurations and input data as raw materials and produces pixels as the final product. During this pixel manufacturing process, we go through a series of steps. Some of these steps are programmable, some are only configurable, and others have fixed functionalities. We will examine each of these pipeline steps in detail.
Graphics programming essentially involves configuring the GPU pipeline, feeding input data into it, and receiving the result. Therefore, having a solid and deep understanding of the GPU pipeline is the most important aspect of learning GPU graphics programming. The core activities of GPU programming involve defining pipelines and providing shader programs. It is crucial to understand the GPU pipeline, even more so than being familiar with a specific graphics API. If you have experience with multiple APIs, you will notice that they are all designed around working with the GPU pipeline. Hence, knowing the GPU pipeline well allows us to quickly adapt to new APIs.
First, let's clarify what data and commands are sent to the GPU. So far, we have been referring to these as draw commands or draw requests, but what do these actually consist of? When programming a GPU, we need to provide it with three types of data to work effectively.
The first type of data is pipeline configurations. To use a metaphor, if the GPU is a versatile artist, we can configure it to draw in the style of Da Vinci or Rubens by providing shader programs. A configuration contains many settings, which we will learn about throughout this book, but the key components are the shader programs. Shaders are programs that run on the GPU and determine how geometries should be transformed and how pixels should be colored. However, shader programs are not the only data required for configuration; there are additional steps involved, which we will cover in future chapters.
Second, once the GPU pipeline is configured, it is ready to produce pixels. We now need to feed it with raw inputs, typically hundreds or millions of triangles and texture maps, which the GPU pipeline will convert into pixels.
Finally, there may be other metadata required during the above process, usually in the form of uniform buffers. If we liken shader programs to the programs that run on the GPU, uniforms are like parameters we pass to the program, similar to command-line variables.
Now let's look at the GPU pipeline, a theoretical abstraction of the GPU hardware. While it may not necessarily match the actual hardware implementation, it is the most important concept for real-time 3D programming from a software engineering perspective, as all our programming activities revolve around making use of the GPU pipeline.
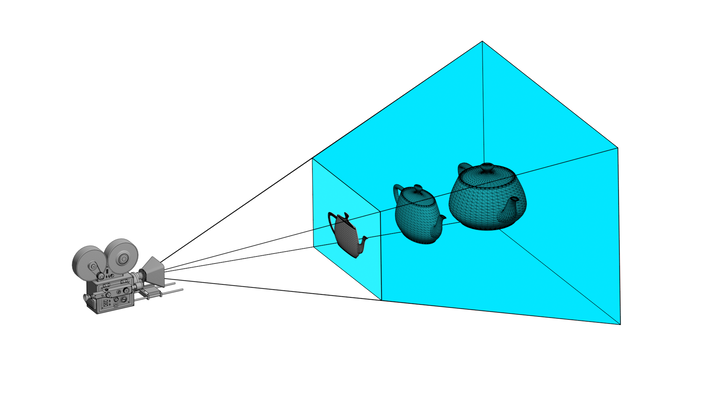
A good way to understand the GPU pipeline is to imagine the GPU as a factory. The raw materials are geometric shapes represented using triangles, and the end products are pixels. The GPU pipeline is the process by which the raw materials are transformed into the final products.
In the 3D world, triangles are the fundamental building blocks for all shapes, just as pixels are for 2D graphics. Why use triangles, you might ask? It is because using triangles is the most cost-effective way of representing arbitrary surfaces in a watertight manner. Watertightness is a crucial concept in computer graphics. A mesh is considered watertight if it does not contain holes and has a clearly defined inside and outside. For a more rigorous definition of watertightness, you can visit this blog and this video.
While using triangles is not the only way to represent 3D shapes, it is the most effective. For example, in point-based rendering, small disks are used to represent the surface of a 3D shape. However, these disks must be densely sampled on the underlying 3D surface to avoid gaps and prevent artifacts from appearing. Even when densely sampled, gaps may still be visible if we zoom in enough. On the other hand, triangles can cover a surface without any gaps, even when zoomed in. For instance, a 3D model of a sphere can be represented using a mesh of triangles, with each triangle smoothly transitioning to the adjacent triangles to form a seamless, gap-free surface. This allows the 3D shape to be accurately rendered even when viewed at high magnification.
Inside the GPU factory, triangles go through a series of steps to become pixels. These steps make up the GPU pipeline. In the past, the GPU pipeline was fixed and could only produce pixels in a predefined manner. However, it has since become programmable, allowing us to write GPU programs called shaders and define our own way of producing pixels.
The classic GPU pipeline consists of four stages: the vertex stage, rasterization, the fragment stage, and blending. While the modern pipeline has introduced additional stages, focusing on these four stages is sufficient for most graphics tasks. Out of these stages, only the vertex and fragment stages are programmable. Each stage processes the data incrementally, transforming triangles into final pixels. Let's examine each stage in detail.
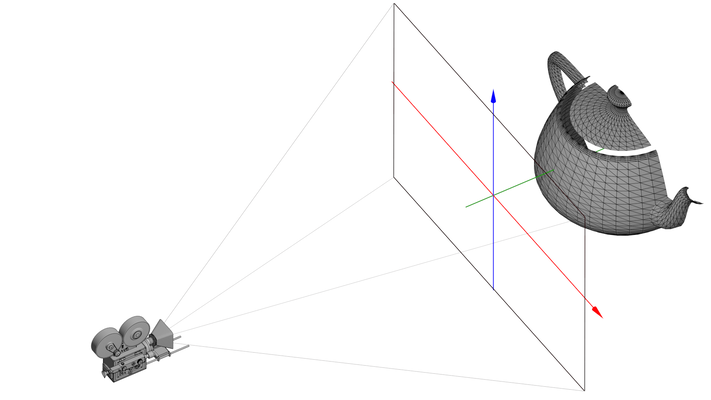
The first stage is the vertex stage. The primary purpose of this stage is to transform 3D geometries into flattened 2D geometries. The inputs to this stage are triangles in a 3D coordinate system called world space. The output of this stage remains triangles, but they have been "squeezed" into the 2D screen coordinate system, also known as clip space. The exact method for converting coordinates from world space to screen space is determined by the vertex shader program. Common operations include perspective projection and orthogonal projection. Regardless of the algorithms applied, the goal is to project 3D objects into 2D so that they can be sampled into pixels.
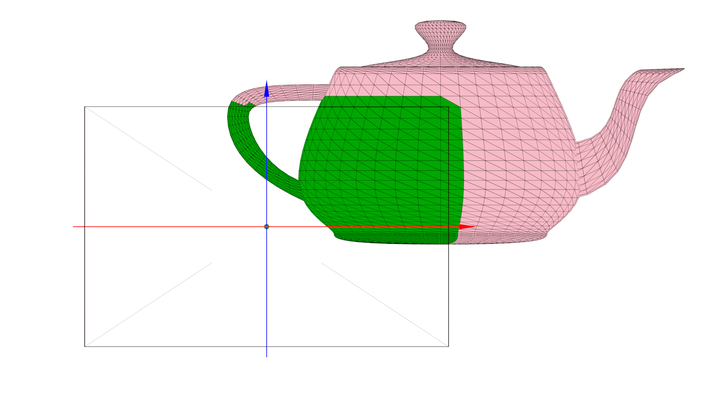
Additionally, this stage performs optimization techniques to reduce the workload of subsequent stages. These techniques include culling, which removes triangles that are facing away from the view, and clipping, which eliminates fragments outside the visible area.
The second stage is rasterization. Rasterization is the process of converting a 2D shape into pixels that cover the same area. The output of this stage is called fragments. It is important to note that fragments are not yet pixels. While both are dots in a 2D plane, pixels have color and are displayable, whereas fragments are dots with arbitrary data. The specific data attached to fragments can include texture coordinates, depth, and colors, but their final colors have not yet been determined. This is the task of the next stage.
When we feed triangle data into the pipeline, we can attach metadata to triangle vertices. Typical examples include texture coordinates and colors. A triangle has only three vertices, but once it is converted into fragments, many more fragments are generated to cover the triangle. How can we attach the metadata to these fragments? The rasterization stage uses interpolation to generate the corresponding metadata for all fragments. Simply put, interpolation assigns a weighted average of the metadata values to each fragment based on its distance to the three vertices.
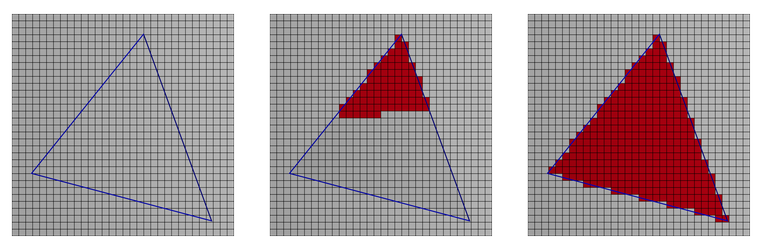
The rasterization process can be likened to laying down a triangle brick wall. With the fragments generated, we move on to the fragment stage. In this stage, we assign a color to each fragment, effectively turning it into a pixel. The coloring logic is determined by the fragment shader program that we provide.
Finally, the blending stage applies each newly generated pixel to the existing image in the frame buffer. The frame buffer is a temporary storage area containing the current rendering, including all previously drawn elements. In the blending stage, we have the flexibility to define how we want to mix the existing pixels with the new pixels. Blending is particularly useful for implementing transparent effects, for example. Once blending is complete, the frame buffer is presented to the user, concluding one frame of rendering.
WebGPU and other 3D graphics APIs provide a set of functions to help us define the graphics pipeline and send resources to the GPU for processing. Therefore, configuring the pipeline is the central focus of our study.
Before we conclude this section, let's discuss why we need GPUs in the first place. Why can't we just use powerful CPUs to handle graphics work? To use an analogy, imagine that you're a factory owner. Would you always want to hire employees with Ph.D.s? If you're building a patent factory, hiring Ph.D.s makes perfect sense. However, if you're building a banana canning factory and the task is simply peeling bananas, hiring 100 monkeys might be a better choice. With the same number of resources, you could maintain a much larger team of monkeys. Ph.D.s are very capable and can collaborate well on research projects, but peeling bananas doesn't require extensive research capabilities or collaboration. CPUs are like Ph.D.s in that they are very capable and designed to handle synchronization well. GPUs, on the other hand, contain massive arrays of small computation units that can quickly handle simpler tasks, especially when the tasks are independent and don't require collaboration. When it comes to flattening triangles and coloring pixels, both of these tasks are simple and independent, so a GPU is the ideal hardware for them. In the past, GPUs were only used for graphics, but as soon as they became programmable, more and more use cases started to benefit from them, such as artificial intelligence, physics simulation, and video and image processing.
In summary, this lesson provided an overview of the GPU driver and the graphics pipeline, explaining how the pipeline converts triangles into pixels. In the next lesson, we will learn how to configure our first WebGPU pipeline to render a simple scene.
| [1]: | The Camera model used in diagrams throughout this book, "1930's Movie Camera" by Daz, is licensed under Creative Commons Attribution. |